Find a Showroom
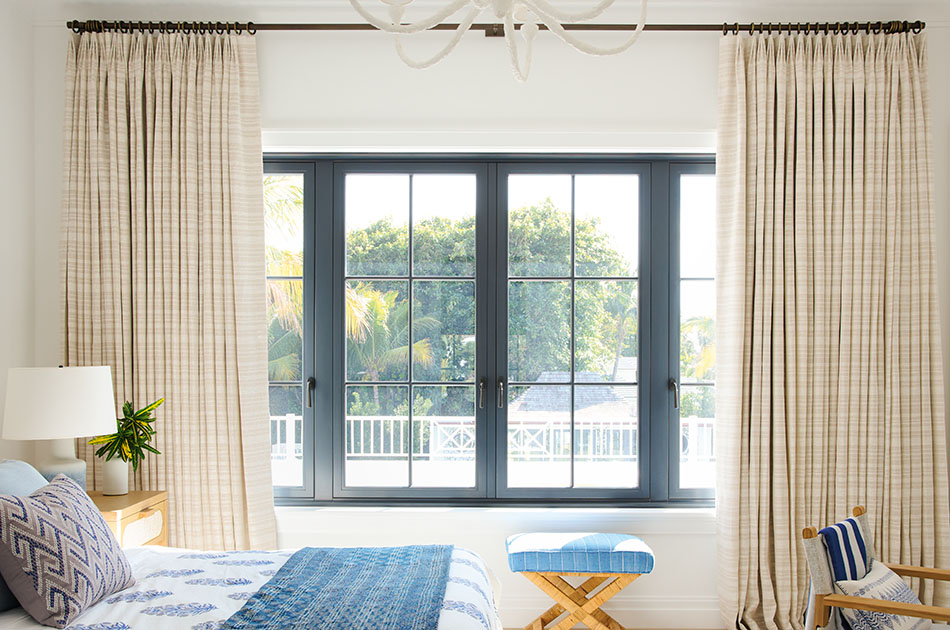
How to Hang Curtains to Look Their Best
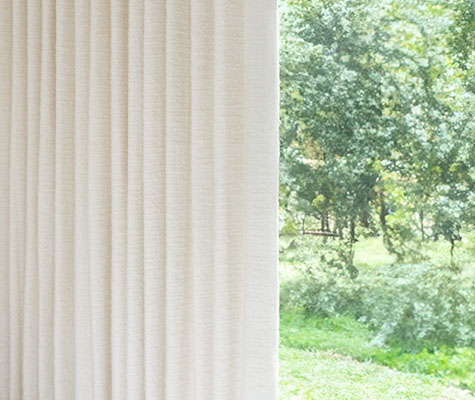
Drapery can transform an entire room, adding color and texture to your space to give a finalized, polished look. Yet, if not hung in the best way, curtains can lose their impact on the room. To ensure your beautiful curtains look their best and accentuate the height and width of your room, learn how to hang curtains the right way.
To learn how to hang curtains to look their best, follow these steps.
STEPS FOR HOW TO HANG CURTAINS
- Step 1a: Measuring Length
- Step 1b: Measuring Width
- Step 2a: Mark Bracket Placement
- Step 2b: Fasten Brackets & Mount Curtain Rod or Track System
- Step 2c: Hang Drapery
- Pleat Style
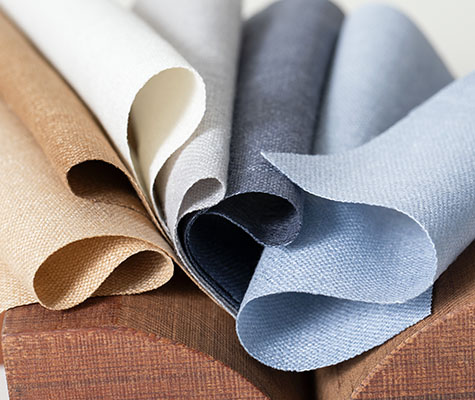
- Fabric
- Lining
- Hardware
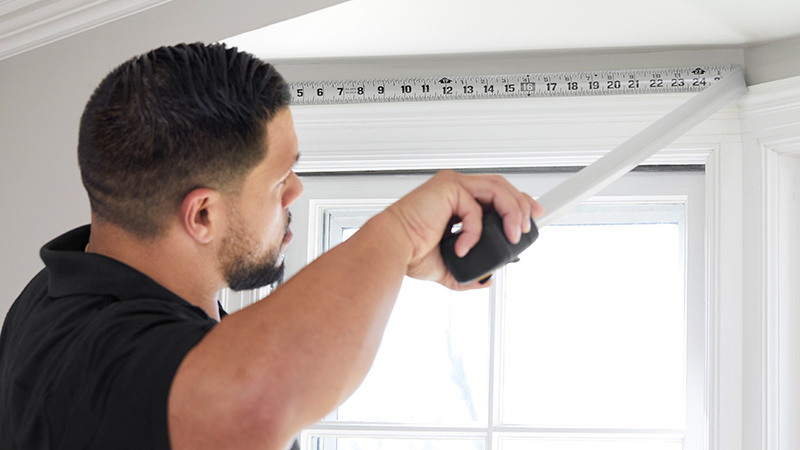
Step 1: Measure for Length & Width
To know how to hang curtains to look their best, it’s essential to get the right measurements for the length and width that will optimize the appearance of the drapery and your room as a whole. Learn the best practices for how to hang window curtains in terms of length and width to help guide you in your own measurement process. Then get direct steps for measuring length and width for your drapery.
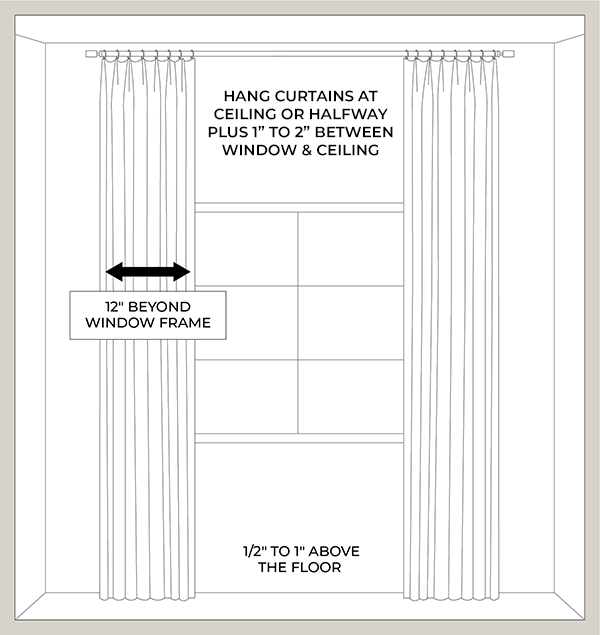
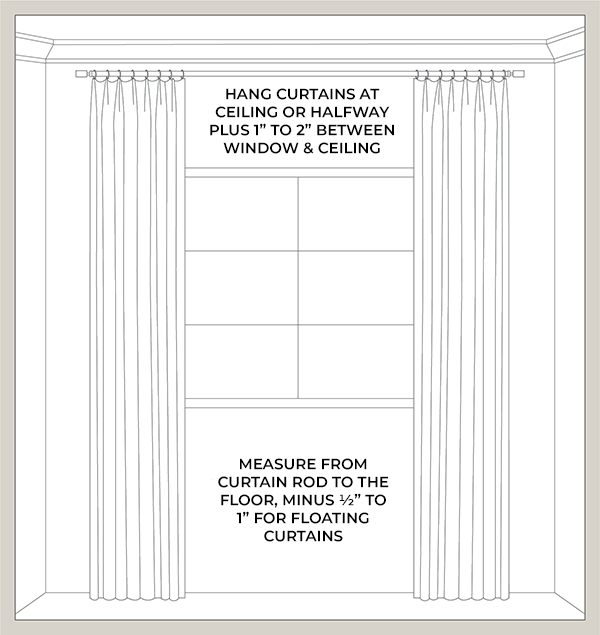
Length: A good rule of thumb is to hang your curtains halfway between the top of the window and ceiling, plus an inch or two. Hanging curtains just below the ceiling is also a great option for most windows, but certain factors like crown molding and cathedral ceilings can affect what the best height for your drapery is.
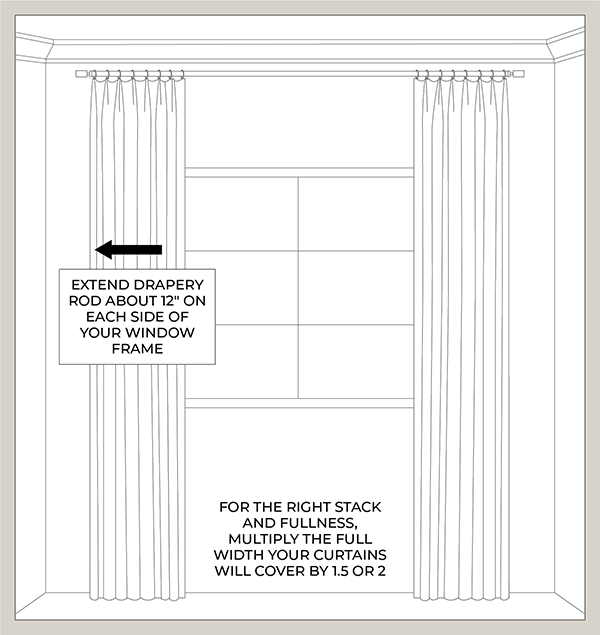
Width: For your curtain rod width, adding at least 12 inches on each side of your window frame will ensure the drapery can be pulled fully off the window for a clean, unhindered view. However, the exact ordering width for your drapery panels will vary based on the fabric, lining and pleat style you choose.
Step 1a: Measure for Length
The length of your drapery will depend on:
- How high you hang your drapery
- How far your drapery panels will hang in relation to the floor
First, consider your drapery height, or rather, how high you’ll hang your curtain rod.
drapery height
Hanging your drapery right below the ceiling or about halfway between the window frame and ceiling are good general best practices.
These options make the window and the room look taller, creating an illusion of space. Hanging your curtains too low near the window frame can make your room feel short and cluttered.
However, there are some exceptions to hanging your curtains about halfway between your window and ceiling. For the following situations, consider a slightly different approach:
- For cathedral ceilings, stick to hanging your curtains about 8 to 10 inches above the window frame to help the windows feel taller, without going excessively high.
- For shorter ceilings where there’s about 6 inches or less between the window trim and ceiling, hang your curtains right at the ceiling or, better yet, ceiling-mount them. This will give you more of a lofty, sophisticated look even with shorter ceilings.
- For ceilings with crown molding, it’s usually best to hang the curtains right below the crown molding to avoid an unattractive gap between the ornate molding and your decorative drapery.
Now that you have insight into how to hang curtains in terms of height, it’s time to consider how long your drapery panels will be.
Drapery Length: Float, Break or Puddle
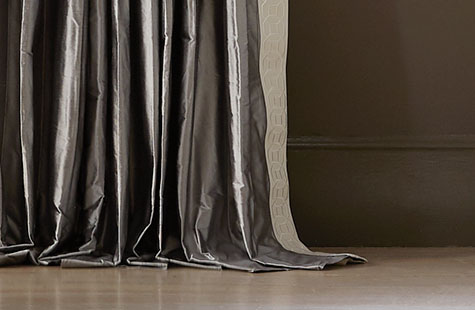
In general, curtains should touch or hover just above the floor. Long drapery panels are the best way to accentuate the height of your window and make your room feel larger. Sill-length curtains are a possibility, but they may make your window and wall feel shorter.
When considering the best way for how to hang curtains, there are three main lengths you can choose from:
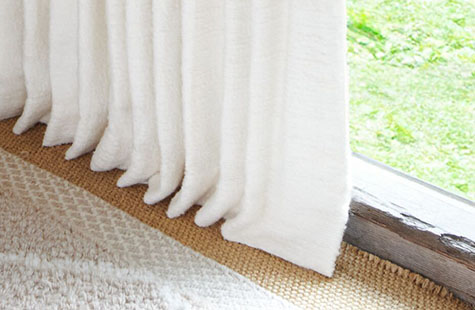
float
Floating curtains mean that they hover just off the floor. This option is ideal if you’re going to be opening and closing your drapery frequently. To get the right float, your drapes should be between 1-inch and ½-inch off the floor. However, keep in mind that some natural materials like wool or linen stretch overtime with gravity. To keep these materials at the right length is to have them professionally hemmed every year or so.
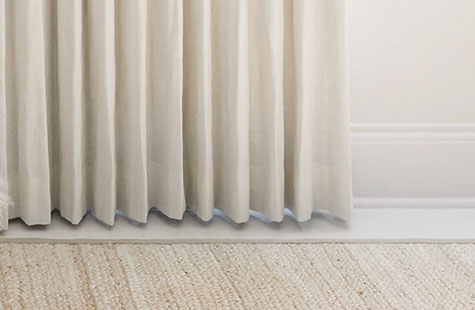
break
Curtain length with a break means that the fabric is long enough to kiss the floor, with about 1 to 2 inches of excess fabric. This is an ideal option for uneven floors you’re trying to disguise, or if you want an elegant, elongated look for your drapery. A break is also a better choice for more stationary, decorative drapes that won’t often be opened or closed.
puddle
To hang curtains with a puddle, allow 3 to 6 inches of extra fabric in your curtain’s length so there’s an excess of fabric puddling on the floor. This is a very elegant, luxurious look, and another good option for disguising uneven floors. However, the extra fabric will more easily collect dust and dirt, so it’s best applied to decorative drapes that won’t often be opened or closed.
Step 1b: Measure for Width
When considering the width of your drapery, there are two factors to consider:
- The width of your curtain rod
- The width of your drapery panels
best practices for Measuring Width
Curtain Rod Width: Typically, adding at least 12 inches on each side of your window frame will ensure the drapery can be pulled fully off the window glass for a clean, unhindered view. Plus, a longer rod with drapes hung wide also helps to make the window look wider.
Drapery Panel Width: The width of your drapery panels will depend on the desired fullness and stack:
- Fullness refers to how lush and full they look when drawn closed.
- Stack refers to the amount space the drapery takes up when fully drawn open.
The fullness and stack will vary primarily based on the pleat style, fabric and lining you choose for your drapery.
Typically, a good way to figure out the width of your curtain panels is to divide the window width by two and then add that number to the total width. For example, if you have a 100-inch window, dividing it by two gives you 50. So, when adding that to 100, the total width you want to take into account is 150 inches. While this gives you a good estimate, drapery fabric, lining and pleat styles will vary naturally in their fullness and stack, so you may need to adjust that number based your choices.
Simplify Ordering Width with The Shade Store
When you order drapery from The Shade Store, you only need to provide the width you want your curtain rod to cover. Our team of expert artisans will do the math for you, based on your chosen drapery pleat style, fabric and lining, to optimize the fullness and stack.
Step 2: Install & Hang Your Drapery
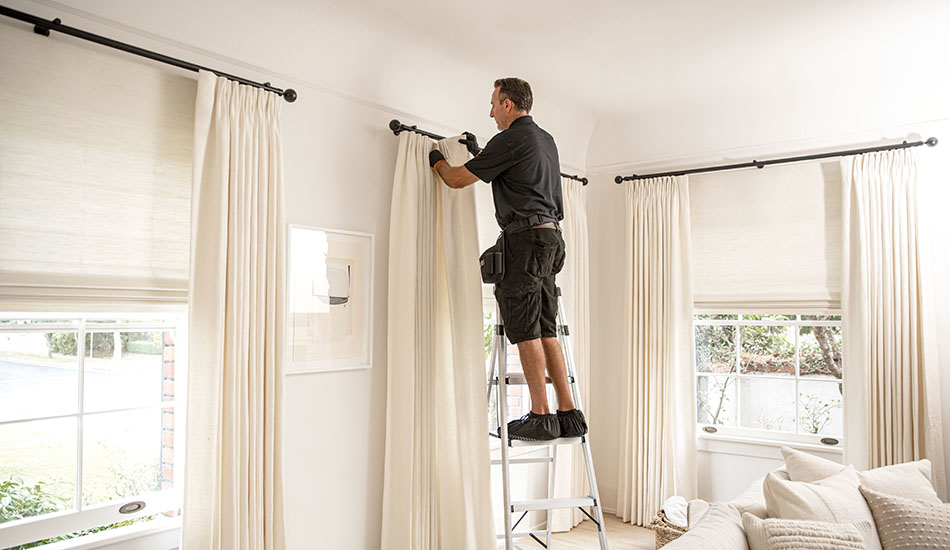
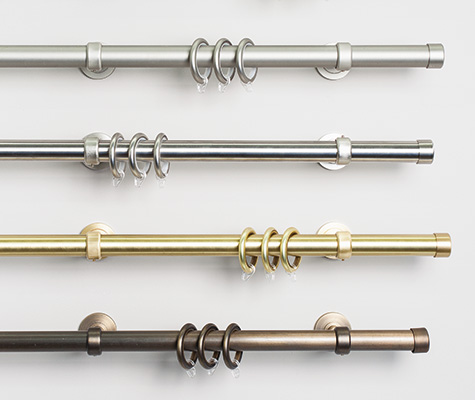
With measuring and some design best practices for how to hang window curtains in your toolkit, you’re ready to learn installation tips. Installation best practices for how to hang curtains are very similar between different types of drapery hardware (either a track system or rod and rings) with the main difference being how many brackets you’ll need for each type.
To install your curtain rods, you should always consult the right installation instructions, but for a simple overview, follow these tips:
Step 2a: Mark Curtain Rod Bracket Placement

Once you know the total width of your curtain rod, you can determine how many brackets you’ll need. The number of brackets will depend on:
- The type of drapery hardware you’re using (track system vs rod and rings)
- The total length of your curtain rod
- Whether you’re using a single or double rod
- Whether you mount your curtain rod from the wall or ceiling (although this will play a smaller role than the other two)
For a Single Track System
Whether mounted to the wall or ceiling, you’ll need a bracket about every 2 to 3 feet depending on the width of you track system and the shape of it (whether it goes around a corner, bends, or is straight).
For a double rod system, refer to your chosen drapery hardware’s installation guide.
For a Single Rod and Rings System
Whether mounted to the wall or ceiling, you’ll need a bracket about every 3 to 4 feet depending on the width of your rod.
For a double rod system, refer to your chosen drapery hardware’s installation guide.
Step 2b: Fasten Your Brackets & Mount Rod or Track System
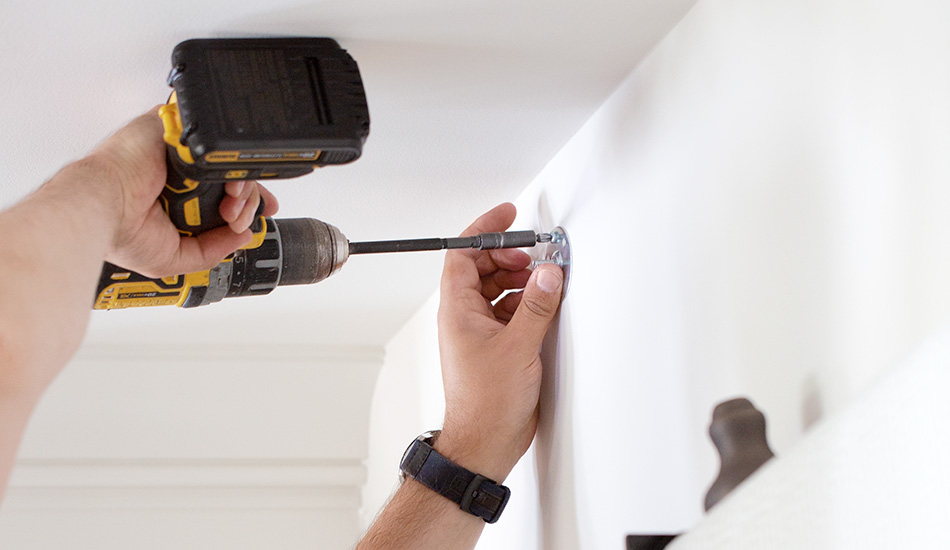
A drill and basic Phillips screwdriver are all you need to install the brackets. Use the drill to create pilot holes based on the marks you made in Step 3a. Then, fasten the brackets with the appropriate screws. Be sure to also have a level on hand to ensure the brackets are level and in plane with each other. Once the brackets are fastened securely, mount your curtain rod or track.
Step 2c: Hang Your Drapery
How to hang curtains will vary depending on the type of hardware you’ve chosen and the drapery style.
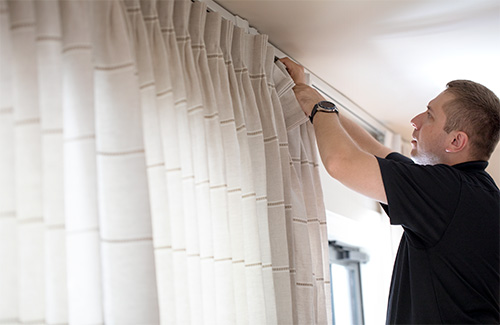
Track System
For a track system, you’ll either be able to snap or hook your curtains into the carriers of the track system.
Rod & Ring System
For rod and rings, first install the rings on your rod. Then, you’ll insert the pins of your drapery through the eyelets of the rings.
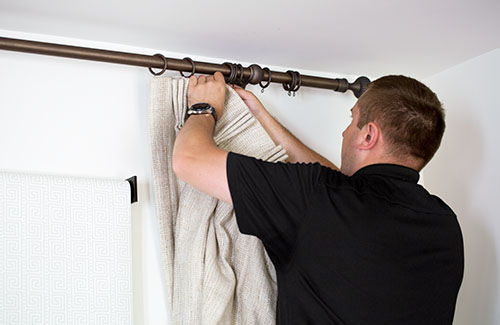
Two exceptions to the above directions for how to hang curtains are Grommet and Rod Pocket Drapery. These are the only types of drapery that will be installed right onto the rod itself, without the use of separate hooks or rings. For Grommet Drapery, you’ll thread the curtain rod through the rings embedded into the top of the panel. For Rod Pocket Drapery, you’ll thread the rod through the fabric pocket at the top of the panel.
Step 3: Learn factors that Affect how to hang Curtains
Now that you know the best practices for measuring and installing your drapery to look its best, you’re ready to consider some additional factors that may affect these best practices. These choices you make for your drapery design, primarily in terms of pleat style, fabric and lining, may affect how to hang curtains to look their best. Learn more about these customizations and how they affect how to hang window curtains.
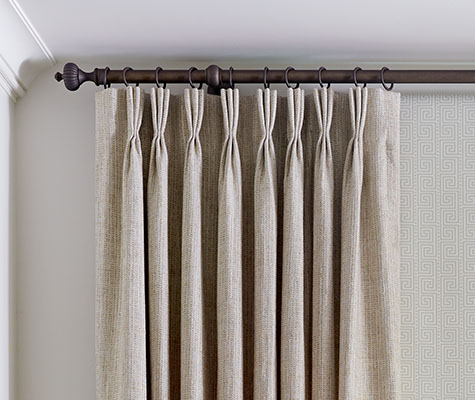
Pleat Styles
Pleat styles refer to how the drapery is fashioned at the very top of the panel. Pleat style affects how to hang curtains in terms of width, as the pleat plays a role in how thick and full your curtains are. To ensure your drapery can be fully pulled off the window, you’ll need to ensure the width of your curtain rod leaves plenty of space for the panels of fabric. Or, if your panels are decorative and won’t be moved, you’ll need to ensure the curtain rod and panel width is just right to accentuate your chosen pleat style in a stationary role.
fabric
Fabrics not only vary in color and pattern, but also weight and thickness, which, like pleat style, will affect how wide your curtain rod will need to be in order to ensure your drapery panels can be fully pulled off the window. You’ll also need to consider the material composition of your fabric. Certain natural fibers like wool or linen will stretch overtime, which means you may want to choose a shorter length for your panels in anticipation of stretching.
lining
Lining also increases the thickness and fullness of your drapery panels, some linings more so than others. Interlining will give you the thickest, fullest drapery, while blackout and privacy lining each will provide some extra body as well. If you’re planning to add lining, you’ll need to take the additional thickness into account when considering how to hang window curtains in terms of width.
hardware
Drapery hardware won’t affect how to hang curtains directly, but it’s important to keep in mind that not all pleat styles are compatible with all types of hardware. So, depending on your choice of pleat style, you may have a limited selection of hardware to choose from. For instance, Ripple Fold and Cubicle Drapery are only compatible with track system hardware, while Grommet Drapery is only compatible with rod and rings hardware.
Ensure the Right Measurement & Installation
With the design savvy and technical knowledge you need regarding how to hang curtains, you’re ready to start the process of measuring and installation. If you have any concerns about how to hang window curtains and would prefer professional help, we’re here for you. Schedule a free measurement today with our expert professionals, to get your project off on the right foot.
SCHEDULE A FREE PROFESSIONAL MEASUREMENT
Ensure your window treatments fit perfectly when you schedule a free measurement with our expert professionals.