Find a Showroom
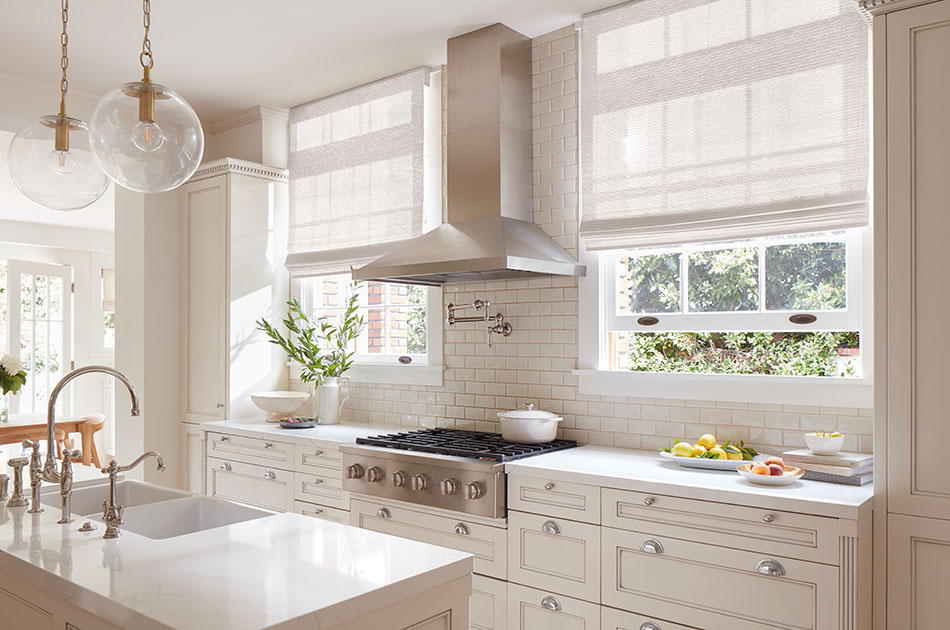
How to Install Shades: Best Practices
Shades are an attractive, functional window treatment option that’s often straightforward to install. If you’re looking to upgrade your windows with new shades, you may be wondering, can I install window shades myself? The answer, for most types of shades, is yes: Installing window shades can be done yourself. Although, the complexity of the project is relative to your skillset and level of confidence. Plus, the steps for how to install shades vary based on the type of shade you have.
To learn how to install shades, first learn the universal steps that apply to all shades. Then, dive into the specific steps for each of the most common types of shades listed to complete the job.
In this article
Should I Install Shades Myself?
At The Shade Store, we typically recommend relying on our professionals for installation of our products, but DIY-ing the project is possible on your own. Be sure to carefully review the steps for how to install shades based on the type of shade chosen to determine whether you’re comfortable DIYing the project.
The instructions in this guide apply specifically to The Shade Store products. If you need support installing any of our products, we’re here to help.
Universal Steps for How to Install Shades
These first couple of steps for how to install shades are universal, regardless of the type of shade you have:
- Step 1: Gather Tools
- Step 2: Measure for Your Shades
Step 1: Gather Tools
No matter the type of shade you have, installing window shades starts with gathering the same tools:
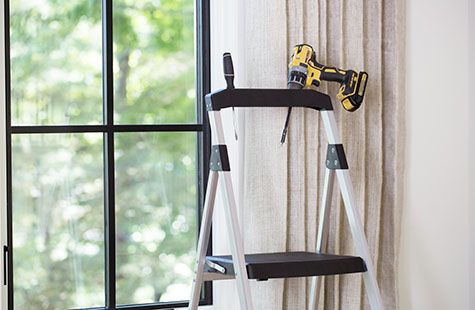
Tools Needed for Shade Installation
- Pencil
- Tape measure
- Level
- Stepladder
- Phillips screwdriver
- Drill
Now that you have your tools, the next step for how to install shades is to measure where your shades will go. This step also applies to most types of shades, with one minor distinction for Roller and Solar Shades.
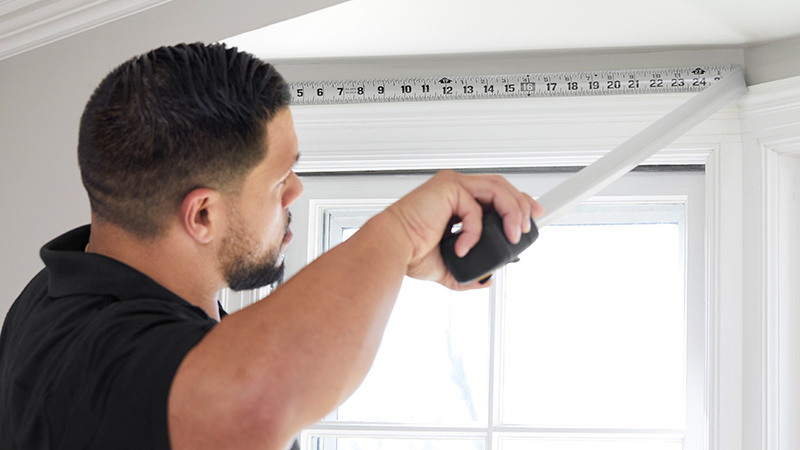
Step 2: Measuring for Your Shades
Installing window shades requires you to measure for the ordering width and length for your shades, as well as determining where on your window your shade will be installed. How to measure for your shades will primarily depend on whether you choose to inside mount or outside mount your shades:
- Inside mount is when your shade is installed inside the window frame, typically being secured to the top or “ceiling” of the frame.
- Outside mount is when you shade is installed outside of the window frame and secured to either the wall or ceiling above the frame.
Deciding on the right application will depend on several factors including the type of shade you have, your window frame depth and your personal preference.
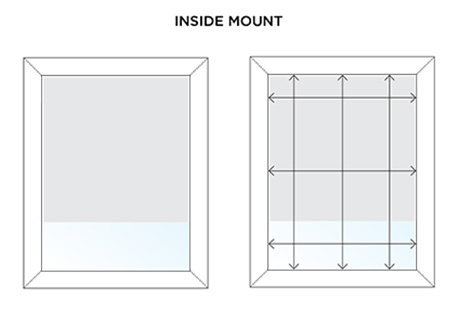
Measuring for Inside Mount Shades
The process for measuring for an inside mount application involves measuring the depth of your window frame (from the glass to the edge of the window’s interior trim). Then, you’ll take three measurements for length and take the largest number as your order length. For width, take three measurements as well and take the smallest number for your ordering width.
Taking three measurements for length and width is important for Roman Shades, Woven Wood Shades and Cellular Shades because it ensures the shades extend all the way to the sill without catching on the sides of the frame.
For Roller and Solar Shades take three measurements for length, but only one measurement for width: at the top of your window frame, since that’s where Roller and Solar Shades are widest.
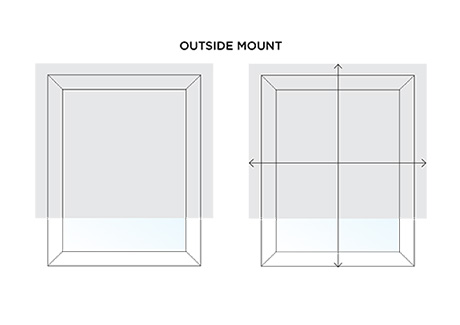
Measuring for Outside Mount Shades
The process for measuring for an outside mount application is even simpler, and is universal, no matter the type of shade you have. Measure for width based on how far you want your shade to extend beyond the window frame. Measure for length based on how high above the frame you want your shades to be.
Specific Steps for How to Install Shades by Type
Now that you know the universal first steps for installing window shades, you’re ready to explore the specific steps for each type of shade.
INSTALL STEPS BY SHADE TYPE
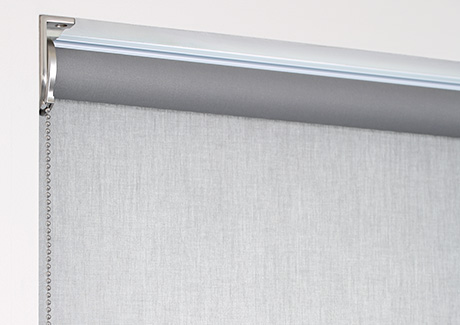
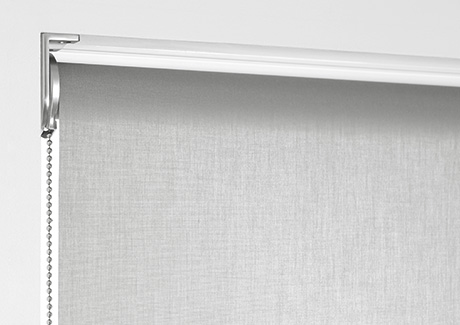
How to Install Roller Shades & Solar Shades

Roller Shades and Solar Shades both have a tube mechanism at the top of the shade that acts as a tension device, helping you raise and lower the shade to the desired position. The steps for how to install window shades like Roller and Solar Shades will vary based on the mount type and the control mechanism you’ve chosen.
The following steps for how to install Roller Shades and Solar Shades are based on a continuous loop or cordless control mechanism. For motorized shade installation, you’ll need to refer to the appropriate installation guide.
Read the
Install Guide
To know how to install shades properly, always begin by reviewing the installation guide for your chosen product to fully understand the scope and requirements for your project.
HOW TO INSTALL ROLLER SHADES
Step 1: Decide on Regular or Reverse Roll Roller Shades
The first step for how to install Roller Shades and Solar Shades is to decide on a regular or reverse roll.
regular roll
The material falls off the back of the tube, closer to the glass.
Ideal for:
- Smaller spaces as it won’t protrude as far from the window.
- Easy layering with other window treatments.
- Pairs well with a valance.
reverse roll
The material falls off the front of the tube, further from the glass.
Ideal for:
- A clean, minimalist look since it hides the tube.
- Doors and windows with handles or cranks that stick out since the material should clear it.
- Can be installed to clear the windowsill so any décor or plants won’t be disturbed when you adjust your shade.
Step 2: Mark Where the Brackets Will Be
Once you decide on a regular or reverse roll, the next step for how to install shades of this kind is to measure and mark where your brackets will go. For Roller and Solar Shades, installing window shades requires only two brackets, and these will go at each end of the tube mechanism.
The placement of your brackets will be based on two factors:
- The width of your shade – Go back to the measurements you calculated in the universal steps to see what the width of your shade is, so you know how far apart to place your brackets.
- The mount type – For an inside mount application, your brackets will likely go into the ceiling or sides of the window frame. For an outside mount application, your brackets will be placed on the wall or ceiling at the appropriate height and width of your shade.
Step 3: Install the Brackets
The next step for installing window shades of this type is to fasten the brackets.
There are a couple different ways you can position your brackets for installation, based on your mount type:
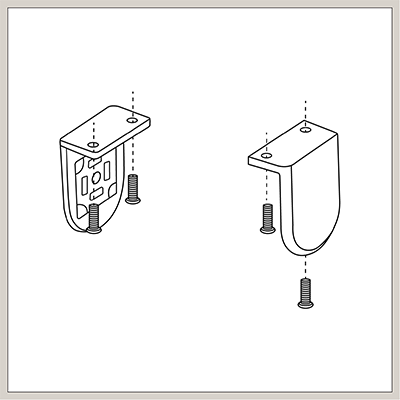
Ceiling Mount: Brackets Hanging Downward
Positioning the brackets upward works for an outside mount application or an inside mount application when the shade is secured into the “ceiling” of the window frame.
Inside or Wall Mount: BRackets Facing Outward
Positioning the brackets straight works for either an inside mount or an outside mount where the bracket is installed into the wall or the face of the window frame.
Step 4: Hang Your Roller or Solar Shades
After you fasten your brackets securely, you can hang your Roller or Solar Shade. To do this, there are two steps:

Step A: Put the end of the tube with the spring-loaded pin into the round hole of the bracket. Pushing the pin end toward its bracket, insert the hooks on the clutch side (where your control mechanism is) straight into the two slots in the bracket.
Step B: Once the two hooks are through the slots, gently pull down the clutch until the two hooks have locked securely to the bracket. The bottom of the clutch, where your continuous loop chain hangs, should point straight down.
How to Install Roman Shades
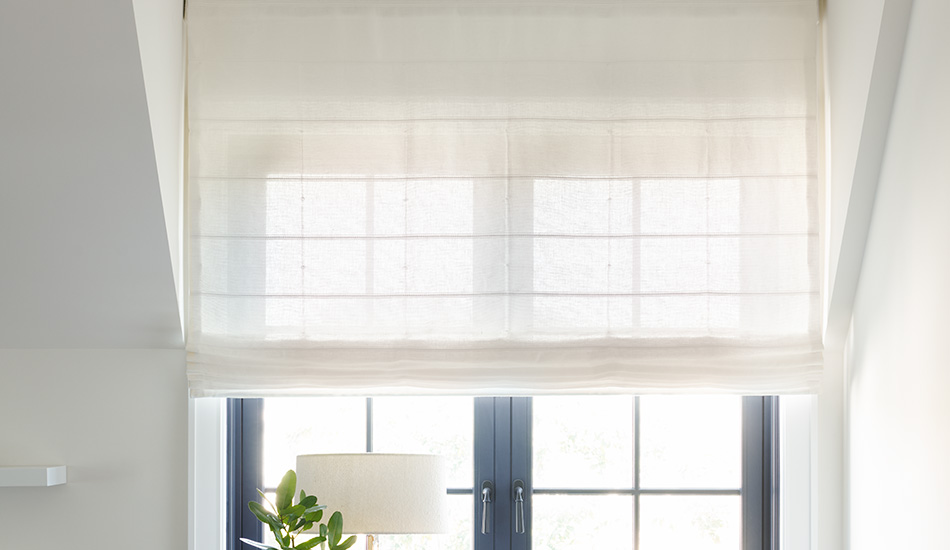
Roman Shades are raised by folding into themselves and lowered by unfolding in a beautiful cascading motion. Roman Shades are typically made of soft, versatile fabric, bringing a luxurious look to the window. These types of shades are installed with a headrail and in order to fully understand how to install Roman Shades, first familiarize yourself with its construction.
The following instructions for how to install shades of this type are based on a continuous loop or cordless control mechanism. For motorized shade installation, you’ll need to refer to the appropriate installation guide.
Read the
Install Guide
To know how to install shades properly, always be sure you begin by reviewing the installation guide for your chosen product to fully understand the scope and requirements for your project.
HOW TO INSTALL ROMAN SHADES
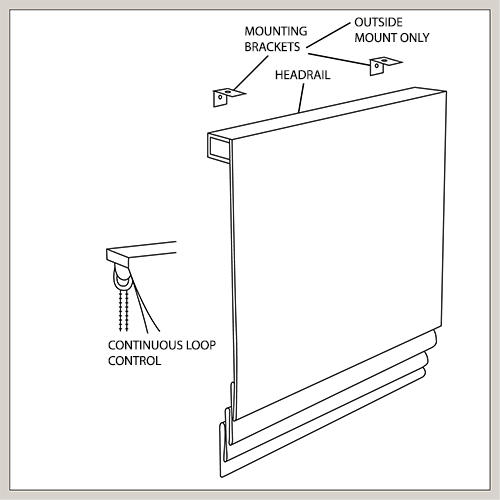
Roman Shade Headrail Construction
The headrail is a piece of wood, typically with the fabric already attached, that securely fastens your shade to the window frame, wall or ceiling.
The process for how to install shades with a headrail requires either screws for an inside mount application, or mounting brackets for an outside mount application, so the steps for each are a little different, too.
Step 1: Mark Where the Screws or Brackets Will Be
The first step for how to install shades of the Roman style is to mark where the screws or brackets will be. Whether you’ll be installing window shades of this type with screws or brackets depends on whether you’ll inside mount (screws) or outside mount (brackets) your shade.
Marking Screw Placement for Inside Mount
The headrail of your Roman Shade will have the mounting holes pre-drilled through the headrail for your convenience. To mark where the screws should be drilled into your wall, first start the screws into the mounting holes and tighten until the tips of the screws are slightly showing on the top of the headrail. Hold the shade, centered, inside the window frame with the front of the shade flush with the front edge of the window frame. Press up on the headrail so that the screw tips leave small indentations into the window frame. This is where your screws will be secured.
Marking Bracket Placement for Outside Mount
Bracket placement for an outside mount application will depend on the measurements you calculated for your shade’s width. Make sure they are evenly spaced, level and positioned in a way where they will not interfere with the shade’s control mechanism. Mark this placement with a pencil.
Also keep in mind as you mark where your brackets fall, that if they do not fall on a stud, you’ll need to purchase a drywall anchor in order to securely attach your shade.
Step 2: Install the Headrail
Now that you have the positions marked for the screws or brackets, the next step for how to install shades of this type is the headrail installation:

Installing the Headrail with an Inside Mount
Pre-drill holes where the indentations from the screws are with a 1/8” drill bit. Re-position the headrail, making sure the screws align with the pre-drilled holes, and fasten the screws securely.
Installing the Headrail with an Outside Mount
Align the brackets where you marked and attach them using the appropriate screws, making sure the brackets remain level with each other. Then set the headrail on the brackets and center it against the wall or window frame. Mark on the headrail where the brackets hit and pre-drill using a 1/8” drill bit at each bracket location. Then attach the headrail to the brackets using the appropriate screws provided.
Since the material for your Roman Shade comes already attached to the headrail, once you install the headrail, you should be able to fully enjoy your functional shades.
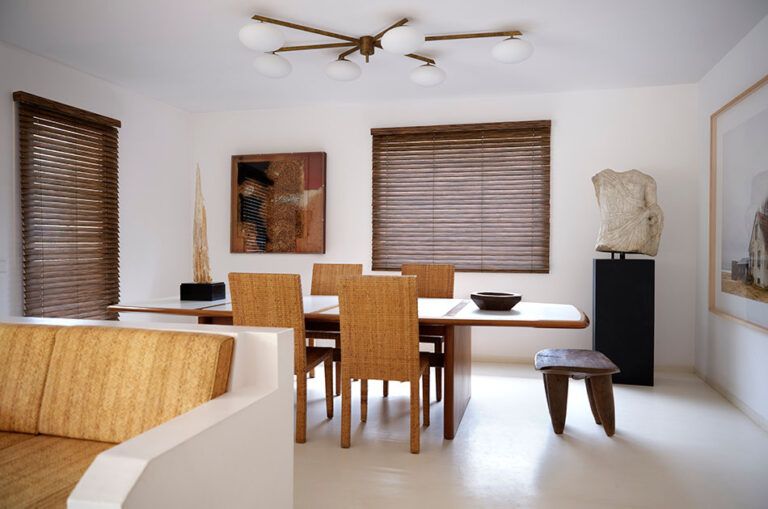
How to Install Woven Wood Shades
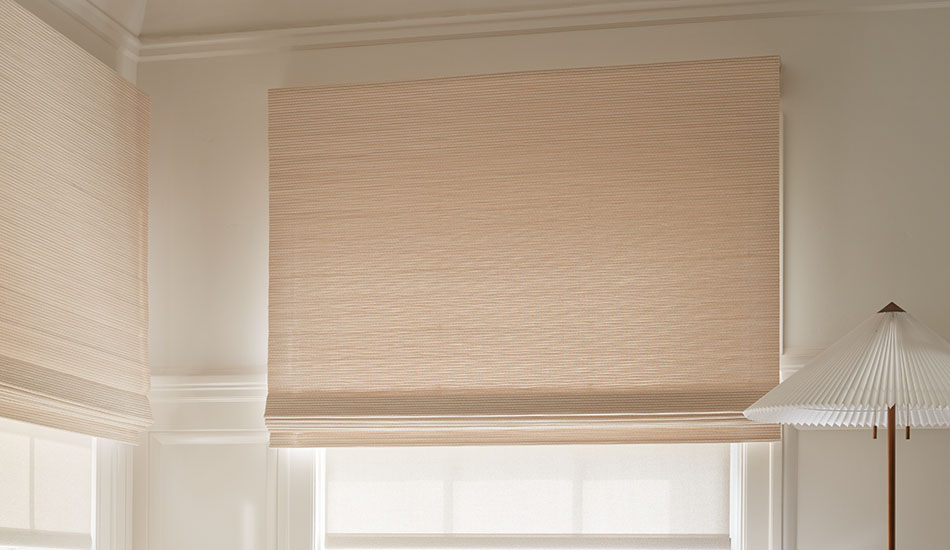
Woven Wood Shades operate in the same way as Roman Shades: They are raised by folding into themselves and lowered by unfolding in a beautiful cascading motion. Woven Wood Shades are made from natural fibers like bamboo, grasses, and reeds for a boho-inspired look. These shades also have a headrail, but their construction is a bit different from a Roman Shade, so before you dive into the steps for how to install Woven Wood Shades, make sure you familiarize yourself with the construction.
The following instructions for how to install shades made of woven wood are based on a continuous loop or cordless control mechanism. For motorized shade installation, you’ll need to refer to the appropriate installation guide.
Read the
Install Guide
To know how to install shades properly, always be sure you begin by reviewing the installation guide for your chosen product to fully understand the scope and requirements for your project.
HOW TO INSTALL WOVEN WOOD SHADES
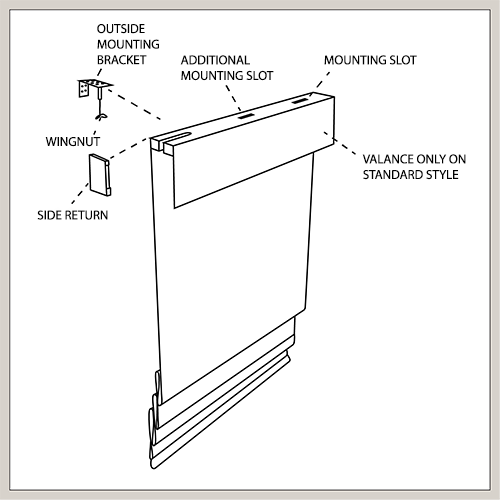
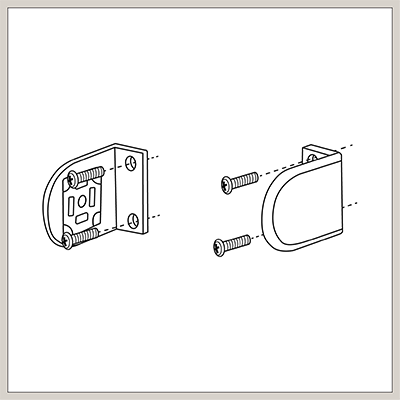
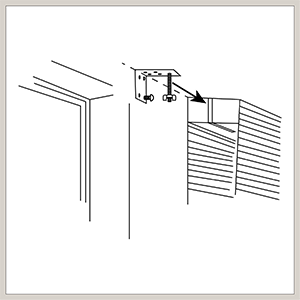
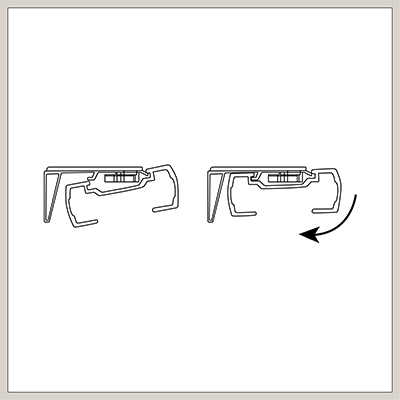
Woven Wood Shade Headrail Construction
As you can see in the diagram, the construction of the headrail is different than a Roman Shade, as it has mounting slots and different brackets for an outside mount application.
Luckily, an inside mount application is still the same as Roman Shade installation. However, when it comes to outside mount installation, Roman and Woven Wood Shades differ.
Step 1: Mark Where the Screws or Brackets Will Be
Just like Roman Shades, the first step for how to install shades made of woven wood is to measure where the screws will be placed for an inside mount or where the brackets will be placed for an outside mount.
Marking Screw Placement for Inside Mount
The headrail of your Woven Wood Shade, like a Roman Shade, will have the mounting holds pre-drilled through the headrail for your convenience. To mark where the screws should be drilling into your wall, first start the screws into the mounting holes and tighten until the tips of the screws are slightly showing on the top of the headrail. Hold the shade, centered, inside the window frame with the front of the shade flush with the front edge of the window frame. Press up on the headrail so that the screw tips leave small indentations in the window frame. This is where your screws will be secured.
Marking Bracket Placement for Outside Mount
Hold your shade at the desired height above the window and make sure it’s centered. Place pencil marks at the headrail on the center of the slot holes. Keep in mind the slot hole on the side where your control will be is inset to avoid rubbing the control mechanism. The pencil marks will indicate where the brackets will need to be fastened.
Also keep in mind as you mark where your brackets fall, that if they do not fall on a stud, you’ll need to purchase a drywall anchor in order to securely attach your shade.
Step 2: Install the Headrail
Now that you have the positions marked for the screws or brackets, the next step for how to install shades of woven wood is the headrail installation:
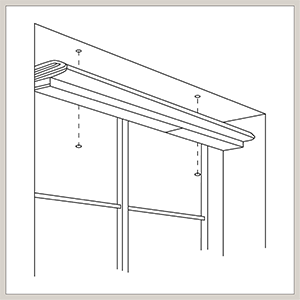
Installing the Headrail with an Inside Mount
Pre-drill holes where the indentations from the screws are with a 1/8” drill bit. Re-position the headrail, with the screws aligned with the pre-drilled holes and fasten the screws securely.
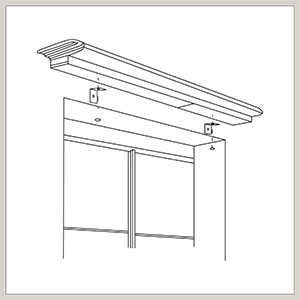
Installing the Headrail with an Outside Mount
Center the brackets on the marks you made in Step 1 and fasten them, so the brackets are centered on the slot holes. With the bracket installed, check that they are level. Then, remove the wingnuts and attach the headrail to the brackets by refastening the wingnuts by hand.
Just like Roman Shades, the material on your Woven Wood Shades comes already attached to the headrail, so you can enjoy your shades immediately after installing the headrail.
How to Install Cellular Shades
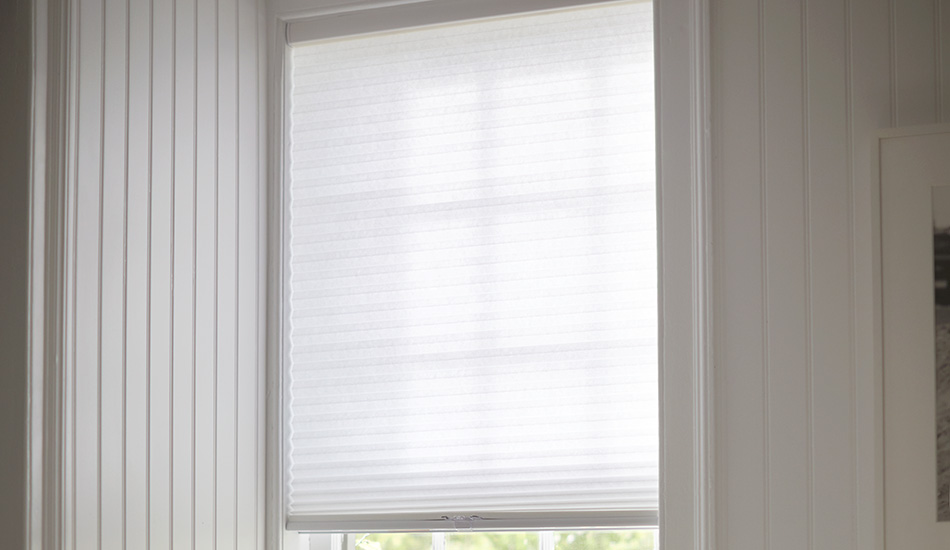
Cellular Shades are a functional, chic shade option made with a unique honeycomb design that helps insulate your room by capturing hot and cold air in its cells. The result is an energy-efficient shade that helps regulate your interior temperatures.
The following steps for how to install Cellular Shades are based on a continuous loop or cordless control mechanism. For motorized shade installation, you’ll need to refer to the appropriate installation guide.
read the
install guide
To know how to install shades properly, always be sure you begin by reviewing the installation guide for your chosen product to fully understand the scope and requirements for your project.
HOW TO INSTALL CELLULAR SHADES
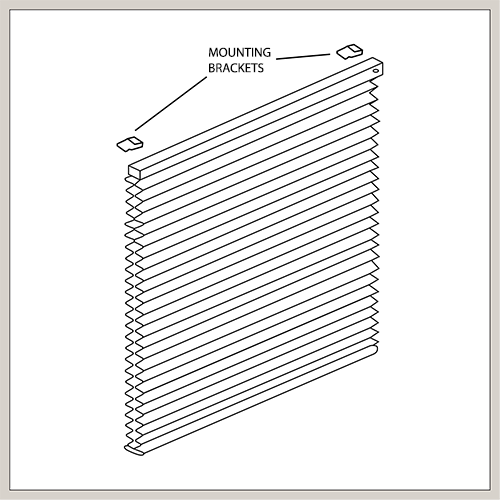
Step 1: Mark Where the Mounting Brackets Will Be
The first step for how to install shades of the cellular type is to mark where the mounting brackets will be. Bracket spacing is the same for both inside and outside mount, so you can follow the same process, no matter your mounting application.
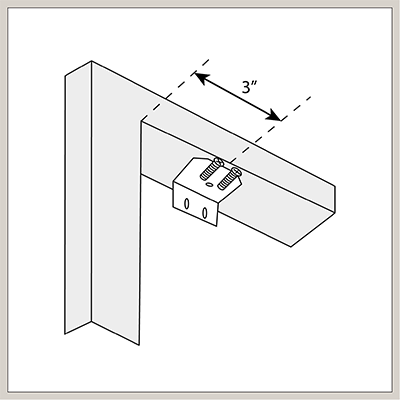
Understanding Bracket Placement
Most Cellular Shades only require two mounting brackets, and these will need to be positioned on your window, so their center lines are three inches from the ends of the shades. If more than two brackets are required, space the additional brackets evenly between the two end brackets. Measure and mark all bracket center lines.
Also keep in mind that you brackets need to fall on a stud, and if they don’t, you’ll need to purchase a drywall anchor in order to securely attach your shade.
Step 2: Installing the Mounting Brackets
Like many of the other instructions for how to install shades, when it comes to fastening the brackets, there are different ways to approach it based on whether you’re going with an inside mount or an outside mount. Follow the instructions below based on your application type.
Inside Mount & Ceiling Mount
For both an inside mount application and a ceiling mount application, the brackets need to be mounted flat against the top surface of either your window frame or ceiling. Once your bracket is aligned to the place you marked in Step 1, place one screw through the hole closest to the front of the bracket and fasten it securely.

Outside Mount
For an outside mount application where the brackets will be placed on the front face of the window trim or on the wall outside of the window, the brackets need to be mounted with the larger flat side facing outward. Once you position your brackets according to the marks you made in Step 1, fasten two screws through the back end of the bracket flat against the window trim or the wall above the window.
Step 3: Install Your Shades into the Brackets
Now that your brackets are fastened, the next step for how to install shades is to attach your Cellular Shade to the brackets. First, unwind the cord if you have a continuous loop control type, but keep the rubber band around the shade stack to make it easier to handle. Next, you’ll clip the headrail into the brackets.
Clipping the Headrail into the Brackets
- Hold the shade up near the brackets and insert the front clip of the bracket into the front groove of the headrail.
- Make sure the shade is centered in the window opening.
- Push the headrail back and up until the back clips of the bracket are inserted in the back groove of the rail.
Removing the Shade
To remove the shade, reverse the procedure. For cordless and continuous loop control types, press the locking tab on back of each bracket to release it.

Get Support for Your Project
Now that you know the details for how to install shades of all different types, you can assess whether you want to pursue a DIY job or get more support for your project. When you choose Shades from The Shade Store, we recommend you rely on our team of professionals for measuring and installation. They’ll ensure your window treatments fit perfectly and operate correctly. Plus, our measurement services are free, so there’s no reason not to take that work off your plate.
SCHEDULE A FREE PROFESSIONAL MEASUREMENT
Ensure your window treatments fit perfectly when you schedule a free measurement with our expert professionals.