Find a Showroom
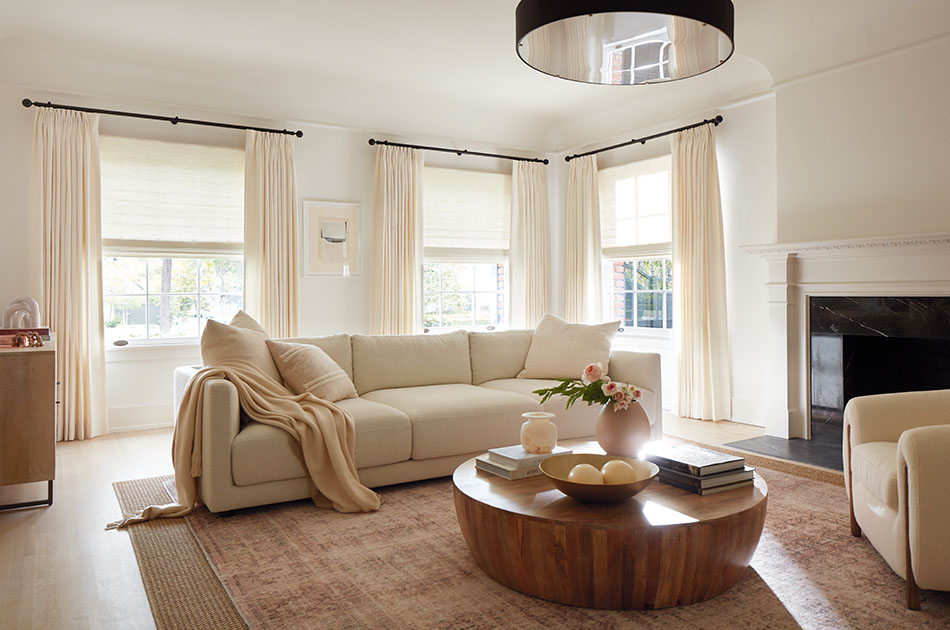
How to Install Curtain Rods: Best Practices
Knowing how to install curtain rods is about more than just screwing brackets into your wall or ceiling. Proper curtain rod placement is what transforms a window treatment from functional to finished. It is also important to know how to decide the right height and width of your curtain rods so that your drapery, when hung, accentuates the window and elevates the overall look of your room.
That’s why learning how to mount curtain rods can actually be broken up into two main parts:
- The aesthetics of how to hang curtains to look their best.
- The installation steps for how to install curtain rods.
how to hang curtains properly
The first part of learning how to mount curtain rods is knowing how to hang your curtains so they look their best and accentuate the room they’re in. The right way to hang curtains will depend on several factors including the height of your ceiling, whether or not you have crown molding, and of course, your individual preference.
To help you decide on how to hang your curtains, there are best practices you can follow:
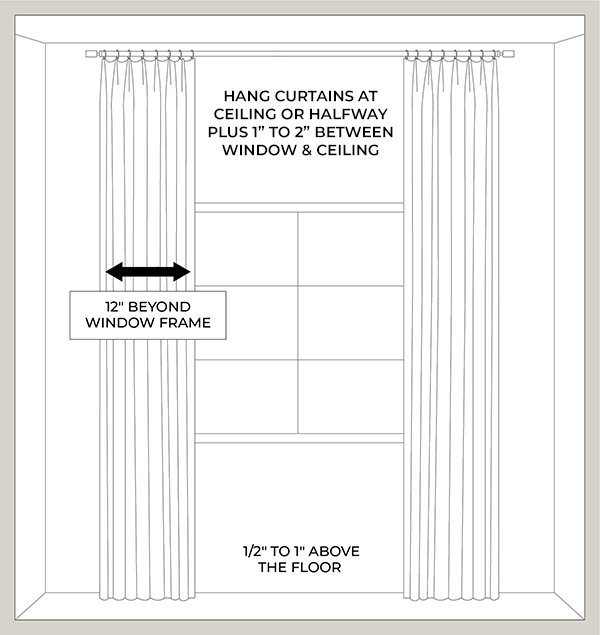
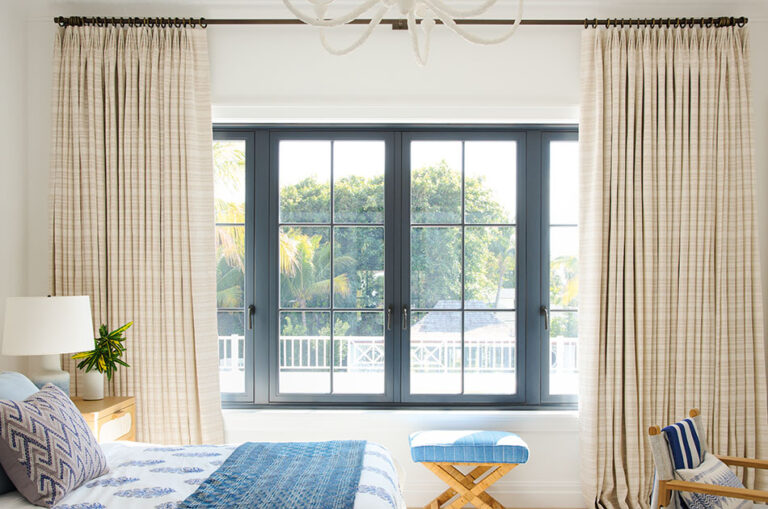
Hang Your Curtains High and Wide
Typically, a good rule of thumb is to hang your curtains a little more than halfway, or about two-thirds of the way up, between the top of your window and the ceiling. Knowing how high to hang curtain rods is one of the most impactful decisions you’ll make, as the right height creates the illusion of taller, wider windows and can make your entire room feel bigger and more spacious.
For width, a good practice is to extend the curtain rod about 12 inches beyond your window frame on both sides.
While the best practice for curtain rod height is ideal for most standard windows with 8- or 10-foot ceilings, there are some exceptions that require adjustments:
- Windows on cathedral ceilings: Hang your curtains about 8 to 10 inches above the window frame to help the windows feel taller, without going excessively high.
- Windows with shorter ceilings: Hang your curtains right at the ceiling or, better yet, use a ceiling mount curtain rod for a seamless built-in look.
- Windows on walls with crown molding at the ceiling: Hang the curtains right below the crown molding.
Additionally, for very wide windows, you may want to extend the curtain rod beyond the recommended 12 inches to balance the visual width of the window, and make more space for your curtain panels to be pulled fully off the window. French return curtain rods can also give your curtain panels a bit more space to fill and give you a clean, wall-to-wall look.
Decide on the Right Curtain Length
In addition to height and width, the length of your curtains is also a part of learning how to mount curtain rods and hang drapery in the best way for your room. The length of your drapery depends mostly on personal preference, but the general best practice is to let the curtains extend to the floor. Cutting them short to hang at the bottom of the window trim can make your window and wall look short. For a deeper look at this decision, our guide on should curtains touch the floor covers every length option in detail.
In brief, you have three main best practices when deciding on length.
Curtain Length Options
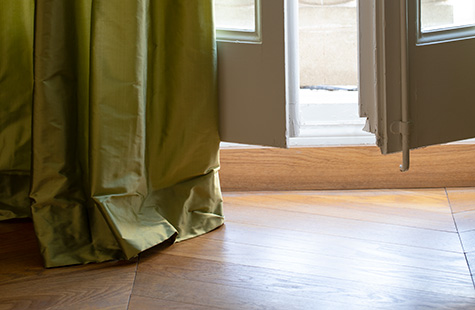
- Float length: Your curtains hover just above the floor for a crisp, clean look.
- Break length: The curtains kiss the floor with 1 to 2 inches of extra fabric to hide uneven floors.
- Puddle length (pictured): The curtains create small piles of fabric with 3 to 6 inches of extra fabric for a luxurious look.
With the basic best practices for hanging curtain rods and drapery established, you’re ready to dive into the installation steps.
How to Install Curtain Rods: Installation Steps
Learning how to install curtain rods is relatively straightforward, and these steps will work for most curtain rod systems. However, there are some minor differences between how to mount curtain rods for a rod and ring system vs. a track system, as outlined in Step 3, as well as how to hang your drapery once the hardware is mounted, as seen in Step 5.
Important
Be sure to always review the installation guidelines for your chosen drapery hardware before attempting installation.
INSTALL INSTRUCTIONS
Step 1: Gather Tools
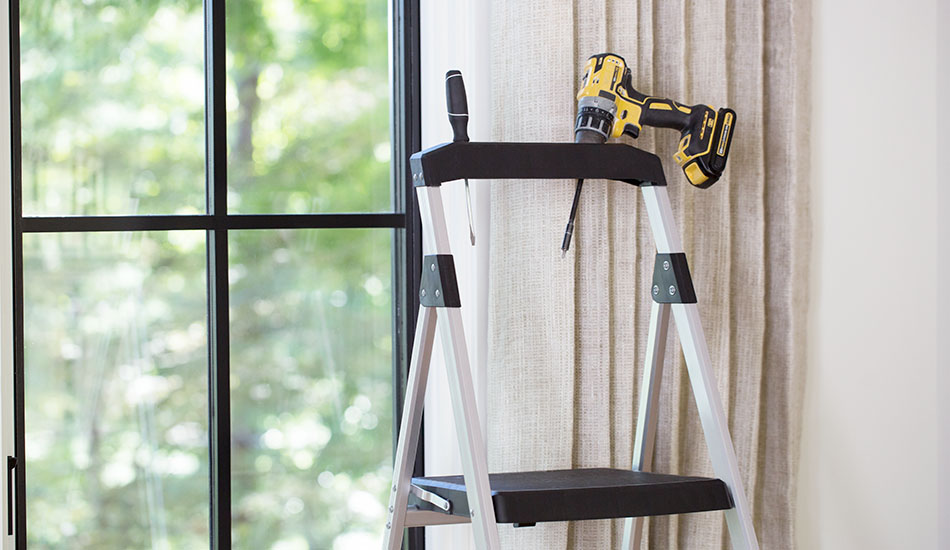
The first step for learning how to install curtain rods is gathering the right tools. Luckily, only simple hand tools are needed for curtain rod installation, and you may have many of them already at home. If you’re missing any of the tools below, you can likely buy or rent them at your local hardware store.
Tools needed for installing curtain rods:
- Step stool or ladder
- Tape measure
- Level
- Phillip’s head screwdriver
- Drill with the right sized bit for your curtain rod kit
- Curtain rod kit (rod, brackets, screws)
- Anchors (if needed) for drywall application
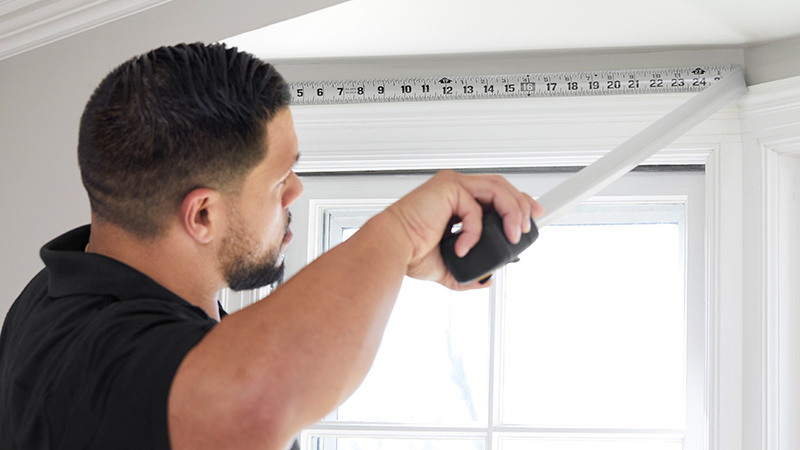
Step 2: Measure the Width & Height of Your Curtains
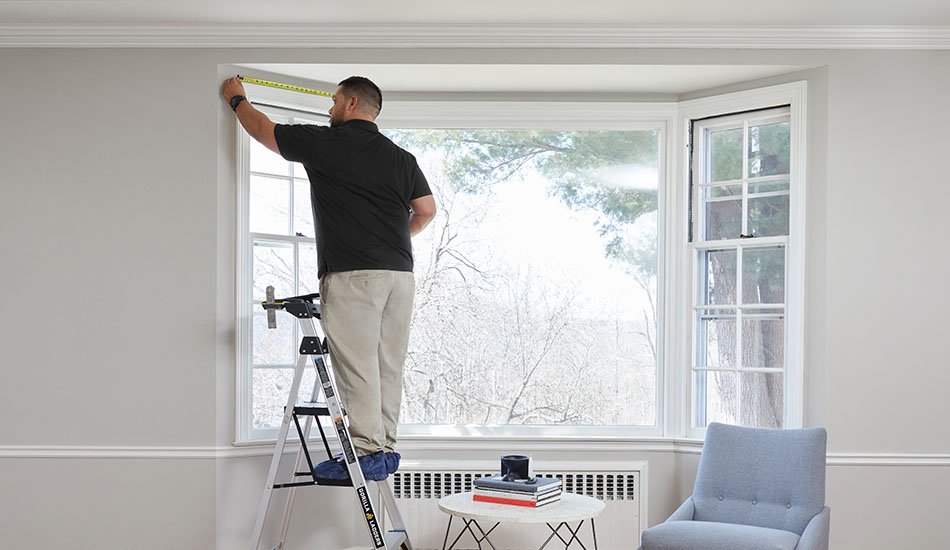
The next step for how to install curtain rods is determining the height and width of your curtains. You can use the best practices outlined above to determine the height and width for your drapery or go by your own preferences. Either way, keep these tips in mind:
- When measuring for height, make sure you understand how your drapery will hang from its rod and brackets. The height of the very top of your drapery will likely be an inch or two lower than where your curtain rod or track system will need to be installed.
- When measuring for width, simply measure where you’d like the rod or track system to end on either side of your window.
For more detailed insights, it is worth reading our full guide on how to measure for curtains to make sure your figures are accurate from the start.
Once you determine the right height and width for your drapery, mark where the ends of your curtain rod will land with a pencil to help guide your installation. It’s also a good idea to use a level to ensure both ends are even.
Step 3: Determine WHERE TO PLACE BRACKETS
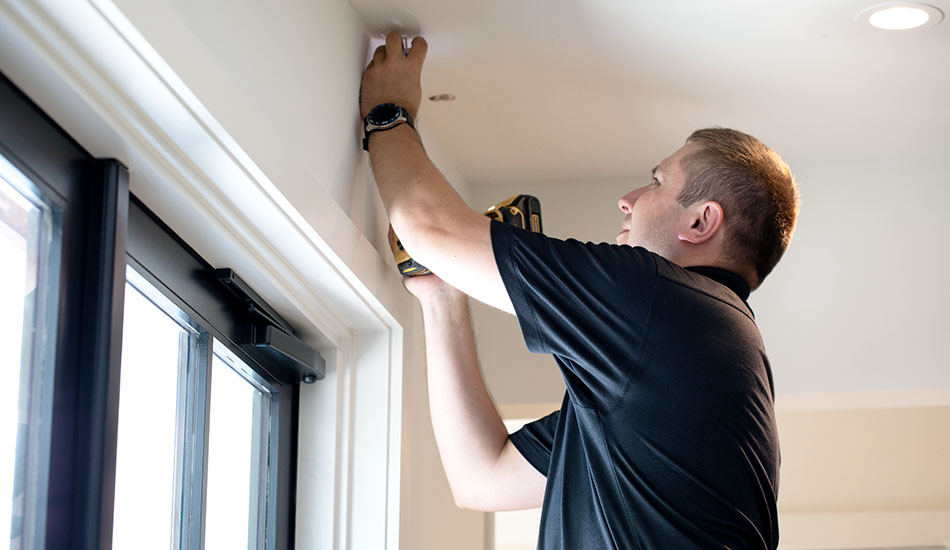
After you’ve measured the height and width of your curtain rod, the next step for how to install curtain rods is determining how many brackets you need. Brackets are structural pieces installed in the wall that are crucial to carrying the weight of the drapery hardware and curtain panels. Learning how many you need is an essential part of how to mount curtain rods.
Do Curtain Rods Need to Be Installed into Studs?
The best practice is to install brackets into studs for the most secure mount, but it may not always be necessary, especially for light drapery like sheers. Try to install as many brackets as you can into studs, but for those that don’t fall on a stud, you can always use the appropriate drywall anchors for the support you need.
How to Install Curtain Rods With Anchors
When a bracket position falls on drywall rather than a stud, drywall anchors are the reliable solution. Choose an anchor rated for the combined weight of your hardware and drapery panels. Plastic expansion anchors work well for lighter curtain rods, while toggle bolts or self-drilling metal anchors are the better choice for heavier drapery or double rod systems. To install, drill a pilot hole at the marked bracket location, tap or thread the anchor in flush with the wall surface, then drive the bracket screw into the anchor. The anchor expands behind the drywall to create a firm hold.
Where Should Curtain Rod Brackets Be Placed?
Curtain rod brackets should be placed at each end of the rod, positioned so the bracket sits roughly 4 to 6 inches in from the end of the rod or track. For wider spans, additional support brackets should be spaced evenly across the width to prevent bowing. Use a level to confirm all brackets are in the same horizontal plane before fastening. If you are installing layered curtains as well, keep in mind additional brackets may be needed to support the extra weight. The exact curtain rod bracket placement for your drapes will vary depending on your hardware system, so always cross-reference the manufacturer’s installation guide for your specific rod or track.
Ultimately, the number of brackets you’ll need for your project will depend on:
- The type of drapery hardware you’re using (rod and rings or track system)
- The total width of your curtain rod
- Whether you have a single or double rod system
- Whether you’re mounting your curtain rod on the wall or from the ceiling
While there are common recommendations for how many brackets you need, it’s essential you consult your chosen drapery hardware’s installation guide to determine the exact number of brackets needed.
Bracket Placement Guidelines for a Track System
The chart shows the number of brackets needed for both single and double track systems up to about 8½ feet to give you a sense of how many are needed, but this is not an exhaustive list. The wider your curtains, the more brackets you’ll need, with ceiling-mounted applications needing more in general than wall-mounted applications.
| Track Width | Wall Bracket Count - Single | Wall Bracket Count - Double | Ceiling Bracket Count - Single | Ceiling Bracket Count - Double |
|---|---|---|---|---|
| 12" - 36" | 2 | 2 | 2 | 4 |
| 36" - 60" | 3 | 3 | 3 | 6 |
| 60" - 84" | 3 | 3 | 4 | 8 |
| 84" - 103" | 4 | 4 | 4 | 8 |
Bracket Placement Guidelines for a Rod & Ring System
The chart shows the number of brackets needed for both single and double rod and ring systems up to about 20 feet to give you a sense of how many are needed, but this is not an exhaustive list. Just like a track system, the wider your curtains, the more brackets you’ll need, with ceiling-mounted applications requiring more than wall-mounted applications.
| Track Width | Wall Bracket Count - Single | Wall Bracket Count - Double | Ceiling Bracket Count - Single | Ceiling Bracket Count - Double |
|---|---|---|---|---|
| 24" - 72" | 2 | 2 | 2 | 4 |
| 72" - 144" | 3 | 3 | 3 | 6 |
| 144" - 240" | 5 | 5 | 5 | 10 |
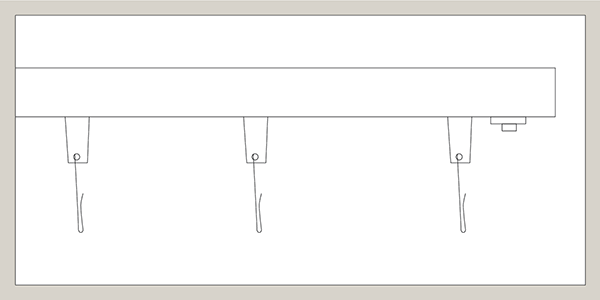
Step 4: Install Your Brackets
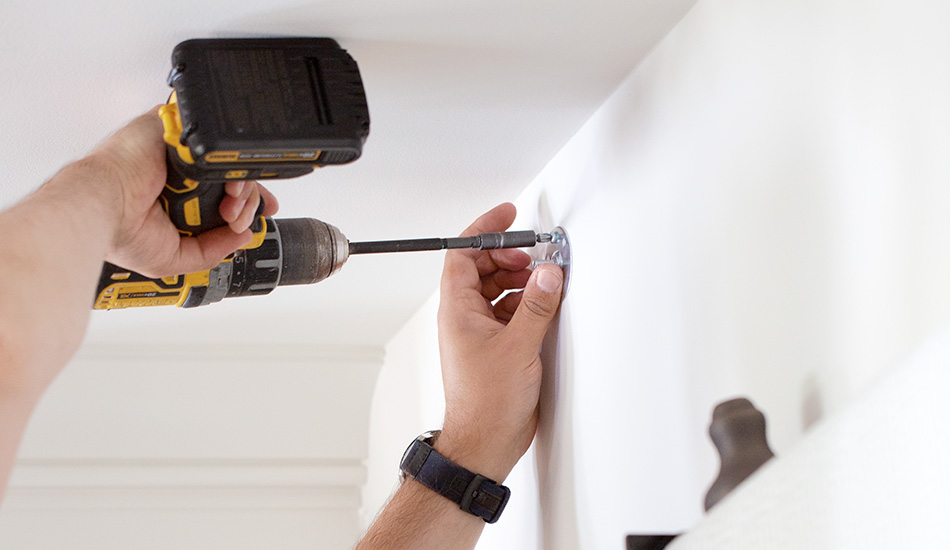
Now that you know how many curtain rod brackets you need and where to place them, the next step for how to install curtain rods is to fasten them. Brackets should be evenly spaced out across the width of your curtain rod, so mark where each should go with a pencil and use a level to make sure they’re all in-plane.
To make things easier, you can create guide holes where needed with a drill and then use either a drill again or a screwdriver to fasten the brackets. Using a drill to fasten may be easier, but a screwdriver can ensure you don’t over-tighten the hardware which can cause stripping of the screw.
After your brackets are securely fastened, you can position your rod or track system onto the brackets.
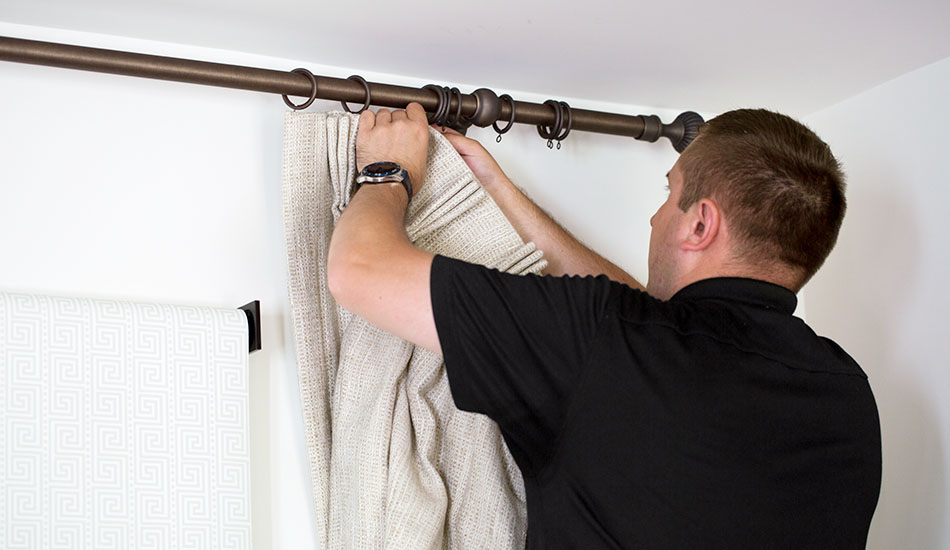
Step 5: Hang Your Curtains
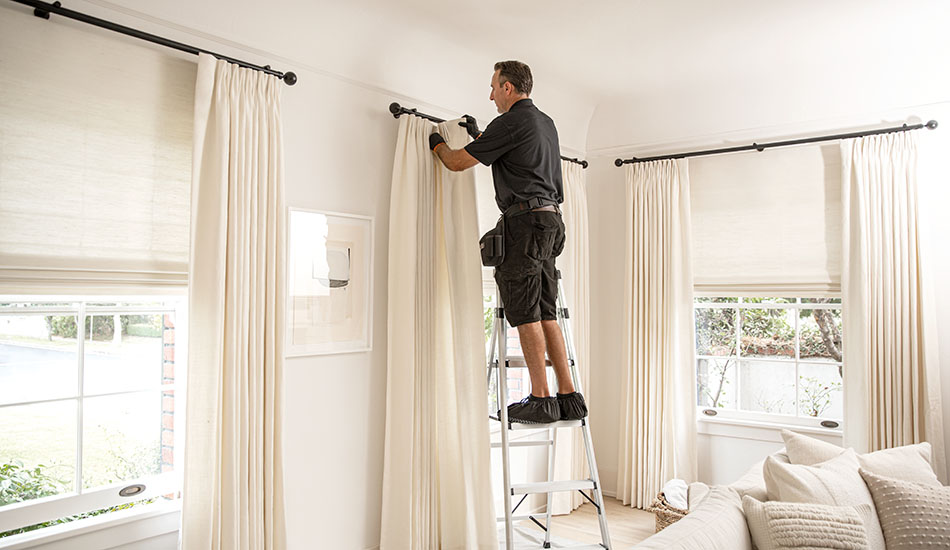
After you’ve successfully learned how to install curtains rods, you’re ready to hang your drapery. Hanging curtains will vary depending on the type of hardware and drapery style you’ve chosen. Also, keep in mind that in some cases, such as if you have small, narrow curtain panels, it may be better to attach your drapery to your curtain rod or track system first before positioning the hardware onto the brackets.
Remember, after hanging your drapery, make sure to dress it by creating folds where needed to make it look its best.
Hanging Curtains on a Track System
Hanging your drapery on a track system is simple but varies a bit depending on the type of drapery you’ve chosen.
SNAP INTO CARRIERS
For some styles like Ripple Fold Drapery, you’ll hang the drapery by snapping buttons on the back of the drapery into the carriers that glide back and forth on the track system.
Insert Drapery Pins into Hooks
For other drapery styles (except for Grommet and Rod Pocket Drapery which are not compatible with a track system), you’ll hang the drapery by inserting the drapery pins (already attached to the top of your curtains) into the hooks of the track system.
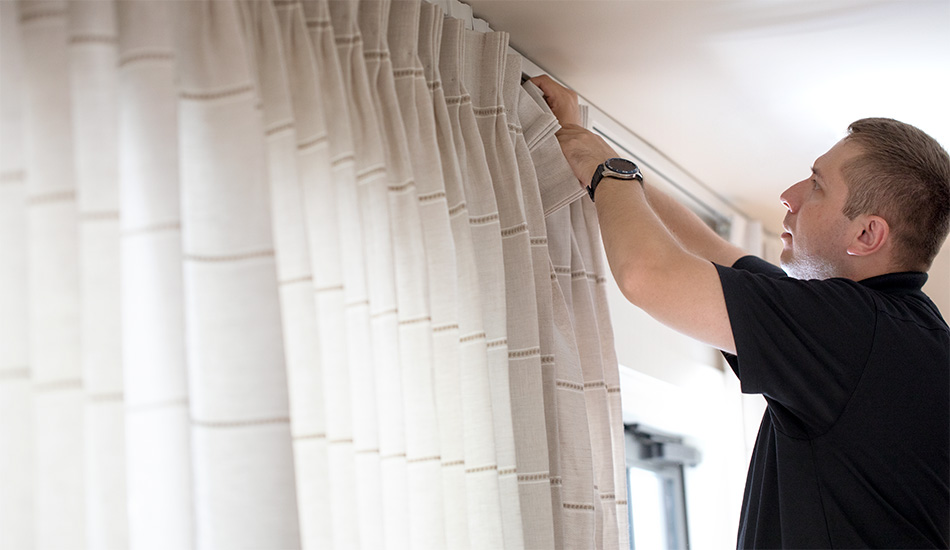
Hanging Curtains on Rod & Rings
How you hang your drapery on a rod and ring system will also depend on the type of drapery you’ve chosen.

Insert Drapery Pins Through Ring Eyelets
For most types of drapery, including Pinch Pleat Drapery (pictured, left), you’ll first want to install the rings on your rod. Once the rings are installed, you’ll insert the drapery pins (already sewn into your curtains) through the eyelets of the rings. To ensure the pins hold onto the eyelets, pinch the pins closed.
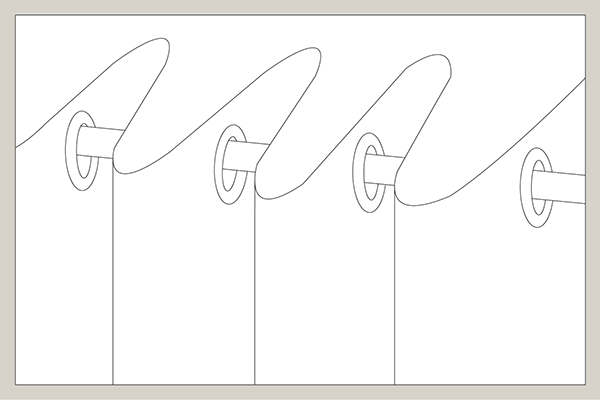
Thread Rod Through Drapery
For Grommet (pictured, right) and Rod Pocket Drapery, the process looks a little different. First, you won’t need to add rings to the rod for these types of drapery. Instead, you’ll thread the drapery rod through the grommets of Grommet Drapery or through the pocket of Rod Pocket Drapery.
Ensure Your drapery Measurements Are Spot On
With the curtain rod placement guidance and installation insight you need, you’re ready to get your project off the ground. If you’re still deciding on a style, our guides to modern curtain ideas and living room curtain ideas are a great place to start. And if you want to explore how drapery lining can improve the look, insulation, and longevity of your panels, that’s worth considering before you finalize your curtains and rods. To ensure your measurements for drapery height, width and length are spot on, rely on the professionals at The Shade Store. With free measurements, you can be sure your curtains will hang in just the right way to elevate the look of your windows and entire room overall.
SCHEDULE A FREE PROFESSIONAL MEASUREMENT
Ensure your window treatments fit perfectly when you schedule a free measurement with our expert professionals.