Find a Showroom
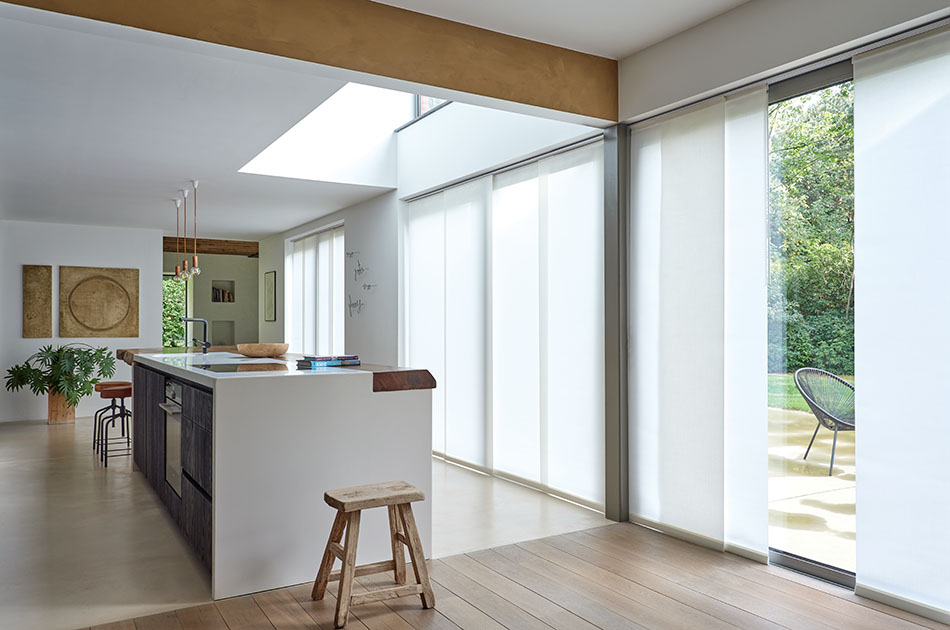
6 Steps for How to Install Vertical Blinds
Vertical Blinds deliver excellent functionality and provide great privacy and light control, while also adding a touch of elegance to your space. These types of blinds are typically used to cover larger floor-to-ceiling windows as well as those that span a wide width. Whether you’re a DIY enthusiast or a beginner, learning how to install vertical blinds yourself is a relatively straightforward process, especially with our step-by-step tutorial. However, the difficulty of your project will ultimately depend on your own skillset and comfort level with the job.
The steps below for installing vertical blinds are specific to Vertical Blinds purchased from The Shade Store. However, many of these steps will likely be similar across different brands of vertical blinds.
LEAVE IT TO THE PROS
To ensure proper installation of vertical blinds from The Shade Store and to maintain the warranty, we highly recommend relying on our team of professionals. Kickstart your project with a free professional measurement. REQUEST FREE MEASURE
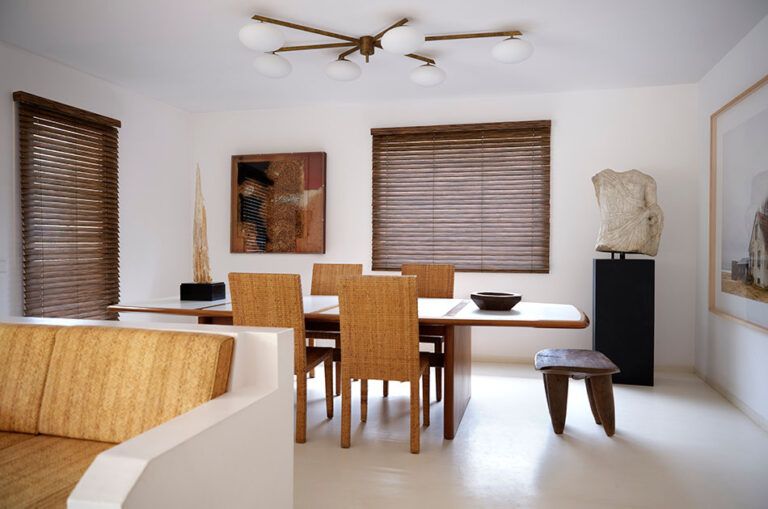
What Are Vertical Blinds?
Before learning how to install vertical blinds, it’s important to understand what they are and their different applications. Vertical Blinds are made up of vertical panels of material, sometimes called louvers, that run on a track system. At The Shade Store, our vertical panels are attached to the track system as flat, overlapping panels, as in a panel track system. However, other types of vertical blinds can be attached to the track from the center of the panel which allows it to be tilted open or closed. Those that are installed flat can sometimes be referred to as “panel track blinds.”

Panel Track Blinds
Panel Track Blinds are a type of vertical blind where the panels are installed flat along the track system. The panels typically run on two to three channels, or lanes, in the same track system so that they overlap each other for the best coverage. At The Shade Store, we only offer Panel Track Blinds.
Installing Vertical Blinds Step by Step

Now that you understand what Vertical Blinds are, you’re ready to dive into the steps for how to install vertical blinds. Remember, these steps are specific to Vertical Blinds, or Panel Track Blinds, from The Shade Store, but they will likely be very similar to the steps for installing vertical blinds of another brand.
Important
Before attempting installation, be sure to read the installation instructions to ensure you fully understand the scope of the project. This guide shows how to install vertical blinds flat on a panel track system, but many of the same steps can be applied to tiltable vertical blinds. READ INSTALL GUIDE
Step 1: Gather Tools
The first step for how to install vertical blinds is to gather all the tools and materials you’ll need for measuring and installation.
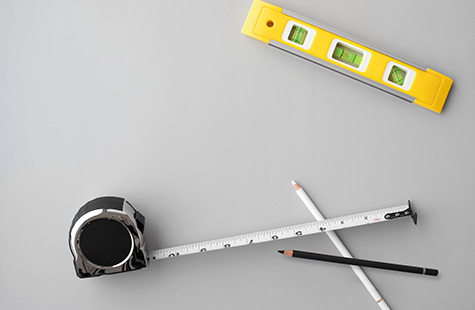
Tools Needed
Tools you’ll need for measuring for and installing vertical blinds include:
- Pencil
- Tape measure
- Level
- Stepladder
- Phillips screwdriver
- Drill
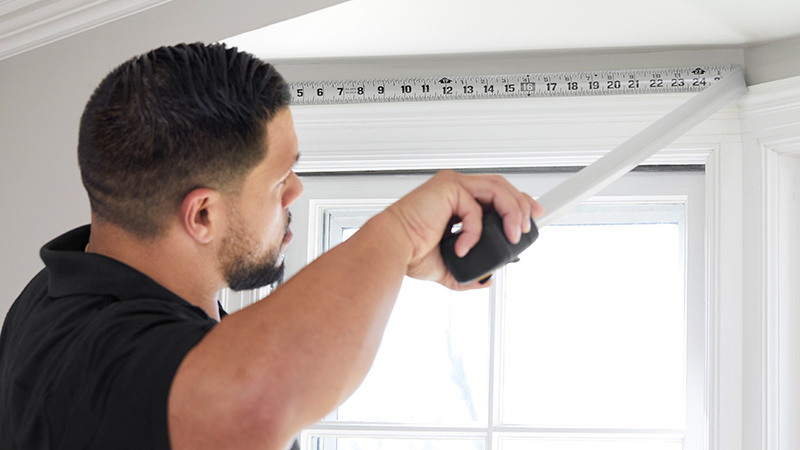
Step 2: Measure for Your Ordering Width & Length
If you don’t already have vertical blinds, you’ll need to measure your window to determine what size of vertical blinds you’ll need to cover the window. This step for how to install vertical blinds is especially important if you’ll be ordering custom vertical blinds tailored specifically to fit your window and application. However, it is also helpful in ordering premade vertical blinds as you can use your measurements to choose the blinds with the closest dimensions to what you need.
Learning how to measure your window for vertical blinds will first depend on whether you plan to inside mount your blinds inside the window frame, or outside mount them on the wall or ceiling above your window.
Measuring for Inside Mount
An inside-mount application means your blinds are installed inside the window frame, typically being secured to the top or “ceiling” of your window box. For an inside-mount application to be secure and work correctly, your window box needs to have a minimum depth of 1 ¼ inch.
To measure the depth, measure at the top of the inside window casing from the edge of the frame to the window. If your depth falls within the 1 ¼-inch requirements, an inside-mount application is possible. However, keep in mind that the depth needed for installing vertical blinds may vary based on the control type you choose. Also, if you would like a flush inside mount, more depth may be required.
Once you’ve established that an inside-mount application is possible, you can move on to measuring width and length.
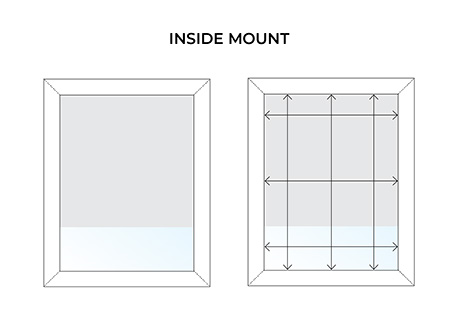
Measuring Width & Length
Measure for Width – Since windows are not perfectly square, take 3 different measurements across the top, middle and bottom of your window and round all measurements down to the nearest 1/8 inch. The smallest of the 3 measurements is your ordering width.
Measure for Length – Take 3 different measurements across the left, center and right of your window and round all measurements up to the nearest 1/8 inch. The largest of the 3 measurements is your ordering length.
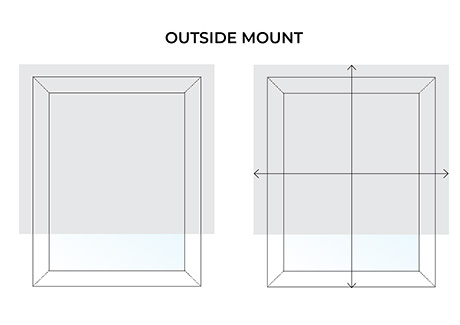
Measuring for Outside Mount
An outside-mount application refers to your blinds being installed on the wall or ceiling above your window frame for a taller and more dramatic appearance. There is no minimum depth requirement for a secure outside-mount application, so measuring for this application only requires a measurement for length and width.
Measuring the length and width for an outside-mount application is a bit simpler than an inside-mount application since you aren’t restricted by the size and shape of your window. To measure width and length, you simply need to measure the area you wish to cover with your vertical blinds.
Measuring Width & Length
Measure for Width – Measure the width of the area you wish to cover. If space allows, we recommend adding another 1 to 1 ½ inches to each side (2 to 3 inches total) to help eliminate light seepage.
Measure for Length – Measure the height of the area you wish to cover, from either the ceiling to the floor or from the wall above your window to the floor.
Want Professional Assistance?
At The Shade Store, we offer free professional measurement services to ensure the perfect fit and functionality for your Vertical Blinds.
Step 3: Mark Bracket Placement
Proper bracket placement is an essential step for learning how to install vertical blinds. Regardless of inside- or outside-mount application, your brackets should be placed 4 inches from each end of the track system. If installing vertical blinds requires more than two brackets, any additional brackets should be spaced evenly between the two end brackets. Always check to ensure all places marked for brackets are level and in line with each other.
Step 4: Install Brackets & Attach Headrail
The next step for how to install vertical blinds is to fasten the brackets along the places marked in Step 3 with the screws provided. Each bracket must be securely fastened to the mounting surfacing by hitting wood studs. If any screws do not hit wood studs, you’ll need drywall anchors to ensure secure attachment.
Once your brackets are fastened, you can attach the headrail, or track system. The headrail simply snaps into place, regardless of application type.

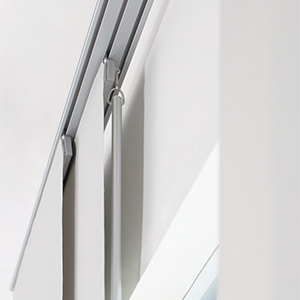
Headrail Attachment: Step 1
To attach the headrail, first lift it up to the brackets. The image directly above shows brackets for a multi-channel track in an outside-wall-mount application. Inside- and outside-ceiling-mount applications will not feature the L-shaped bracket, only the top bracket, but headrail attachment is the same.

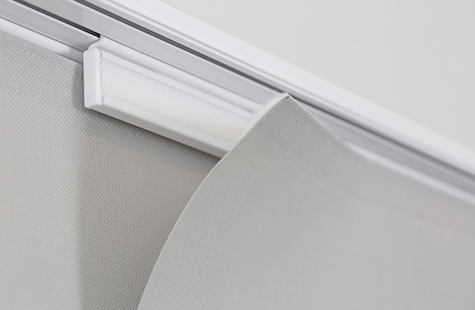
Headrail Attachment: Step 2
Click the headrail in place as shown. Start by securing the back edge of the headrail and then lift the front up until it clicks into place.
Step 5: Attach Panels to the Track System
After attaching the headrail to the brackets, the next step for how to install vertical blinds is to attach the panels to the track system. Before you can attach the panels, you’ll first need to unpack them and locate the top of each panel. When you order Vertical Blinds from The Shade Store, your panels will come rolled up. Gently unroll each panel and locate the top, which will be the part that will attach to the headrail. The bottom of the panel will have a sewn-in weighted bar.
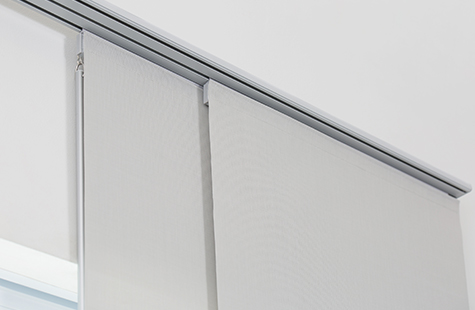
Installing Vertical Blinds on a Panel Track System
Step 5a: Pull forward on the bottom of the front panel carrier and push back on the bottom of the back panel carrier to slide the back carrier from behind the front carrier. Repeat this action for the number of panels on your headrail.
Step 5b: Align the Velcro strip at the top of each vertical panel with the Velcro strip on the front face of the panel carrier. Beginning at one end, press the Velcro strips together across the panel carrier. Repeat this step until all panels are attached.
Step 5c: After all panels have been installed, return the carriers to their original positions.
Step 5d: Once all carriers are returned to their original position, you should have overlapping panels.
Step 6: Install Tension Device or Baton
The next and final step for how to install vertical blinds is to complete installation of the control type. This step will depend on whether you chose the continuous loop cord control system or baton control. If you chose a continuous loop cord control system, you’ll install the tension device to keep the looped cord taut. If you chose baton control, you’ll just install the baton.
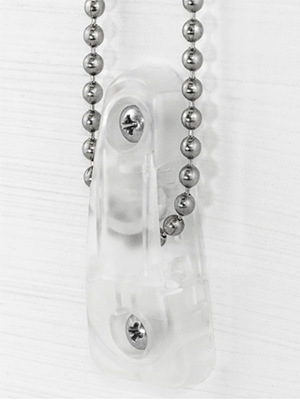
Tension Device Installation
You’ll want to position the tension device in your window frame or on the wall so that it is in line with the control cord and holds it taut but does not interfere with the operation of the vertical blinds.
Fastening the Tension Device
The tension device will be pre-installed at the top of the cord loop. Slide the device down to the bottom of the loop and position it on your wall or window frame where you would like the device to be fastened.
Then, insert and fasten the two screws through the holes in the device to hold it in place.
baton installation
To install the baton, you’ll simply fit the metal hook on the baton through the slot on the back of the leading panel.
Maintenance & Cleaning
After learning how to install vertical blinds, it’s also important to know how to maintain and clean them so they remain looking and functioning their best. For everyday cleaning of your panels, use a low-suction handheld vacuum to remove dust and dirt. For stains, the cleaning process will vary based on the material you’ve chosen. Therefore, we highly recommend connecting with a local window treatment cleaning specialist who can often treat your blinds onsite without taking them down.
Rely on Professionals for the Best Outcome
Rather leave it to the professionals? Our team of window treatment experts knows how to install vertical blinds from The Shade Store in every application to give you the perfect fit with flawless functionality. Begin today with a free measurement with our professionals and save yourself the trouble.
SCHEDULE A FREE PROFESSIONAL MEASUREMENT
Ensure your window treatments fit perfectly when you schedule a free measurement with our expert professionals.